Friday, November 27, 2009

Daring Baker's November Challenge--Cannoli


he November 2009 Daring Bakers Challenge was chosen and hosted by Lisa Michele of Parsley, Sage, Desserts and Line Drives. She chose the Italian Pastry, Cannolo (Cannoli is plural), using the cookbooks Lidia’s Italian-American Kitchen by Lidia Matticchio Bastianich and The Sopranos Family Cookbook by Allen Rucker; recipes by Michelle Scicolone, as ingredient/direction guides. She added her own modifications/changes, so the recipe is not 100% verbatim from either book.
 
Cannoli are known as Italian-American pastries, although the origin of cannoli dates back to Sicily, specifically Palermo, where it was prepared during Carnevale season, and according to lore, as a symbol of fertility. The cannoli is a fried, tube-shaped pastry shell (usually containing wine) filled with a creamy amalgamation of sweetened ricotta cheese, chocolate, candied fruit or zest, and sometimes nuts. Although not traditional, mascarpone cheese is also widely used, and in fact, makes for an even creamier filling when substituted for part of the ricotta, or by itself. However, cannoli can also be filled with pastry creams, mousses, whipped cream, ice cream etc. You could also add your choice of herbs, zests or spices to the dough, if desired. Marsala is the traditional wine used in cannoli dough, but any red or white wine will work fine, as it’s not only added for flavor or color, but to relax the gluten in the dough since it can be a stiff dough to work with.

You can find the full recipe on the daring kitchen website.

 I don't think my cannoli turned out quite right. They didn't bubble very much. Not sure if I didn't put in enough vinegar (I used apple juice instead of wine) or if I didn't roll it thin enough or if it was because the forms I used where not as thick as they should be (only 1/2" thick) so the dough wrapped around a few too many times. I might be fiddling with these again after Thanksgiving, but for now life is too complicated and busy to try again.
Many people commented that the dough was tough to roll out and they weren't kidding!
Here's my dough

Here are my cannoli shells with the forms I used

I couldn't find marscapone cheese (not that I looked too hard) so I just used ricotta and made the traditional filling. Not quite sure if it turned out right, I whipped that ricotta for what seemed like an eternity but it was still not "smooth" so I'm afraid it was a little too grainy. I'm not a fan of pistachios, so I didn't add that. Also, I wasn't sure if you were supposed to add the chocolate pieces and zest or pick one or the other. So, I made the traditional filling and added citrus to 1/3, and chocolate pieces to the other 1/3.
I also used some semi-sweet ganache, added some whipped cream to make a chocolate filling. So here you have from left to right, ganache, traditional, traditional with chocolate pieces, and traditional with orange zest.

I dipped some in ganache as well (not pictured) and used some homemade no-sugar-added apple pie filling to make a dairy-free option for a co-worker (also not pictured).
Although decorating a cake for the cake competition, and experimenting with cannoli and my husband making chili for a chili cook-off may have been too much for one weekend and one small galley kitchen--we survived...we just had to schedule the kitchen!!! And I did really enjoy trying something new, especially something I had never eaten before! Thanks for the great challenge Lisa!
Tuesday, November 10, 2009

Fall Cake Competition

The Daring Kitchen that I am a member of posted this cake competition about a month ago.  I really debated about whether or not I should enter because I hate making something I enjoy doing become a stressful challenge.  But when I decided to just do it for fun and gave myself ample room to back out even at the last minute, I went for it.

The Daring Kitchen, in conjunction with the U.S. Confection Connection, is offering one lucky person the chance to attend the New York Cake Convention from January 2 to January 5 on an all-expenses paid trip.

In addition to that all-expenses paid trip you also get to assist pastry chef Michelle Bonmarito

 I didn't really know who that was until I looked up her Bio and read that she had worked for Martha Stewart Omni-media and debuted on television when she helped Martha make the “Spring Garden Cake” in 2000.  When I read that I googled that cake and my suspicions were confirmed, in high school me and a friend got together one Saturday and replicated that cake--that was my first experience with cake decorating.  Wouldn't that be such a great story to tell if I won the cake competition?!?!?  Unfortunately, I am 100% confident that there are so many other cakes that were entered that were better than mine.  But at least my co-workers were amazed by it and it was a great hit!

  The cakes are judged on originality; execution; and best representation of Autumn but not on taste.  I made a chocolate cake, trimmed it up and layered the middle with mango jam.  I then strained the remaining mango jam and heated it up and poured it over the top and sides of the cake for a crumb coating.  Then I poured chocolate ganache on top of that.  I lined the edges of the cake with pecans (my Southern accent) and topped it off with a pile of chocolate leaves I had made.  I melted white chocolate, added some oil and food coloring and painted the back of washed leaves.  They then cool in the fridge for a few hours before I peeled off the leaves.  I named my entry "Fall Flare".  So, what do you think?


Tuesday, October 27, 2009

Daring Bakers October Challenge--French Macarons

The 2009 October Daring Bakers’ challenge was brought to us by Ami S. She chose macarons from Claudia Fleming’s The Last Course: The Desserts of Gramercy Tavern as the challenge recipe.

THE DARING COOKS OCTOBER 2009 CHALLENGE: MACAROONS

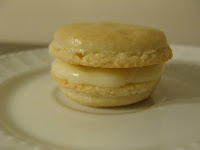
Before the challenge reveal date I had never eaten nor heard of a French Macaron.  To me, a macaroon was one of those chewy cookies made mostly of coconut.  I was a little intimidated by the challenge after reading so many posts about how these cookies are so hard, how successful macarons have large feet and you have to "age" your eggs, yada yada yada.  In my research I found that macarons come in every color possible and every flavor you can think of.  I was a little overwhelmed about the possibilities but decided that I needed to stick to as traditional of a version as I could get so I could experience a true macaron.  I posted on the forum and was informed that the most "traditional" would be to not flavor the cookie and to use nutella or ganache for the filling.  So, I decided on a semi-sweet and a white chocolate ganache.  

My next hurdle was finding almond flour.  After calling 4 stores I was about to give up and borrow a food processor to make my own, then I thought of one other option and I was in luck!  I did age my eggs as was suggested, but I wanted to make them over the weekend and the revel date was Thursday, so I only aged my eggs 2.5 days instead of the 3 days that were recommended.  I set the container of aged eggs out to come to room temperature (I probably should've taken the lid off the container) and it seemed like they were taking FOREVER!  So, I cheated a little on that, (I think they were still a good 45 minutes away from "room temperature") and off I went baking away.  Here is the recipe from Daring Bakers.


Ingredients
Confectioners’ (Icing) sugar: 2 ¼ cups (225 g, 8 oz.)
Almond flour: 2 cups (190 g, 6.7 oz.)
Granulated sugar: 2 tablespoons (25 g , .88 oz.)
Egg whites: 5 (Have at room temperature)

Directions:
1. Preheat the oven to 200°F (93°C). Combine the confectioners’ sugar and almond flour in a medium bowl. If grinding your own nuts, combine nuts and a cup of confectioners’ sugar in the bowl of a food processor and grind until nuts are very fine and powdery.
2. Beat the egg whites in the clean dry bowl of a stand mixer until they hold soft peaks. Slowly add the granulated sugar and beat until the mixture holds stiff peaks.
3. Sift a third of the almond flour mixture into the meringue and fold gently to combine. If you are planning on adding zest or other flavorings to the batter, now is the time. Sift in the remaining almond flour in two batches. Be gentle! Don’t overfold, but fully incorporate your ingredients.
4. Spoon the mixture into a pastry bag fitted with a plain half-inch tip (Ateco #806). You can also use a Ziploc bag with a corner cut off. It’s easiest to fill your bag if you stand it up in a tall glass and fold the top down before spooning in the batter.
5. Pipe one-inch-sized (2.5 cm) mounds of batter onto baking sheets lined with nonstick liners (or parchment paper).
6. Bake the macaroon for 5 minutes. Remove the pan from the oven and raise the temperature to 375°F (190°C). Once the oven is up to temperature, put the pans back in the oven and bake for an additional 7 to 8 minutes, or lightly colored.
7. Cool on a rack before filling.
Yield: 10 dozen. Ami's note: My yield was much smaller than this. I produced about two dozen filled macaroons.

I didn't have any trouble mixing things up.  I only have one silicon pad, so I used some parchment paper too.   I went back and forth a little on small macaroons and larger ones.  But here are my beauties all piped out.


The next hurdle was my annoying oven. I really can't wait to buy a house and an awesome, reliable oven.  I swear our oven is off by 50 degrees, but because every time I count on it being off 50 degrees, I burn things.  So, I usually turn it up about 25 degrees.  But it turned out 25 was not enough.  Not knowing what they should look or taste like I was a little unsure if they were cooked completely, but after we each tasted a couple we decided that the first pan was indeed under-baked.  But, I just threw the pan back in the oven for a few minutes and it all worked out.

The recipe details weren't very clear if you should cool completely on the pan or on cooling racks.  But I quickly learned when the inner half of the cookies stayed on the pan that I needed to let them cool completely on the pan.   

One of the measures of successful macarons is that you have large "feet" (the airy looking bottom half).  I think I was successful on that measure :)

Here is a close up of the feet on my first pan.

Another measure of successful macarons is that they are not golden brown on top, you're supposed to pull them out just before they start browning.  But I was a little worried about under-baking the 2nd pan too so they got probably a little too brown, but still not bad.  And I think this second pan had even better feet than the first!


I made semi-sweet ganache and white chocolate ganache.  But we both found the semi-sweet to be a little too dark for our liking.  So, I ended up mixing some of the white chocolate with the semi-sweet to make a "milk" chocolate ganache.  


I think white chocolate was our favorite but both were absolute DELICIOUS!!!!  And the next day I came to realize that cooled macarons are even better because the ganache sets up enough that it doesn't squish out the sides of the sandwich---yum yum I'm craving them now!  I absolutely fell in love with French Macarons!  I have found a new favorite treat!  Just another reason why being a Daring Baker is so great, you're "pushed" to try something new that you probably wouldn't have ever even thought of trying and you end up finding something you love! 

And a pat on the back:  The non-procrastinating type Daring Bakers (like me) post our challenge pictures early on a forum only DB members can view.  I posted mine the first week of October (after making them on the 4th of October).  One of the two Daring Baker "Macaron experts", Tartelette, commented on mine saying "They turned out perfect! Great job!"  How cool is that?

Friday, October 23, 2009

Baking Overload--Whoopie Pies

Okay, I seriously need to take a baking vacation!  Not because I don't love it, but because I'm worried that that 5lbs I lost a couple months ago is going to come back in no time (it may already be back but I'm refusing to weigh).  I just noticed this picture on my camera and realized I never posted about it!  I made these about a month ago (I really did not realize how much I've been baking lately).  I often get in trouble food blog surfing on my lunch break, because then I just can't shake the urge to bake!  Al sent me a link to this news article about Whoopie Pies, which links you to this recipe.  I cheated a little and used store bought cream cheese frosting mixed with whipped topping (my favorite semi-homemade frosting).  But they were SO good!

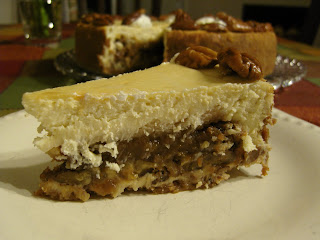
At least every time I bake I'm sure to invite my friend/neighbor/co-worker Lisa over for some taste-testing.  She gave it an "amazing" rating :) The cheesecake with pecan pie in the center was given a "party in my mouth" rating :)

Tuesday, October 20, 2009

Martha Stewart Cupcakes--Boston Cream Pie


This was like 2 months ago, but this summer my sister bought me Martha Stewart's Cupcake cookbook.   And because I wanted to swear off baking for awhile (that didn't happen) to loose weight (that did happen), but also really wanted to try one of the cupcakes, I made these yummy and cute little Boston Cream Pie Cupcakes! 

They were very delicious but a bit messy to eat.  Al's convinced they should be filled with the cream instead of cut in half.  But I learned with these as I seem to be learning with any ganache, cream, ooey gooey centered dessert, that they taste even better and are way easier to eat when you let them cool in the fridge for a few hours.  Definitely making a mental note of that!

I also made the peanut butter and chocolate cupcakes for a work party earlier this month.  However, I overcooked 2 of the 3 dozen and didn't think the 1 salvaged dozen was that great (too dense for our liking).  But, everyone at worked RAVED about them, and for a good week!  I was even asked for the recipe!  I probably could've passed off the overcooked ones and they still would've loved them!  Didn't take a pic of those, didn't think they were picture worthy, but I guess I was wrong.

Thursday, October 15, 2009

Pecan Pie inside of a Cheesecake

When Al and I were at our first BBQ judging event we heard that the previous night, at the "anything butt" contest, a cheesecake with a pecan pie inside was submitted!  Al was bound and determined from then on that we needed to make one ourselves.  So, after finding this recipe online and talking it up for a couple of weeks, Al finally convinced me to make it.  Saturday morning I happened to wake up early and by 8am I had 3 homemade pie crusts in the freezer and a pecan pie cooking in the oven!  On Sunday I made the candied pecans and the cheesecake (with the pie inside).


Then Monday we eagerly came home, hurried to eat dinner and then dove into this heavenly dessert!


Al's mom was waiting on the phone while I took pictures and cut into it, she was so impatient waiting to live vicariously through us while we took the first bites and reported how heavenly it was!

And if you were one of the 8 lucky ones that we work with and got a piece to try--yeah for you! 

Tuesday, October 6, 2009

Curry Chicken


This is one of the stable dinners in our house!  Pictured is 1/2 a chicken breast on top of the dish, I now typically serve the breast to the side.  Al found this recipe for "Country Captains Chicken" which we just call Curry Chicken from the website at the University of SC's culinary school restaurant, The McCutchen house.  Use the following link for the recipe from the McCutchen house, which is formatted nicely to print out and put in your recipe binder.  But I've also pasted it below so that I could add my comments of the changes we've made to the recipe and tips I have, those are in brackets and in italics along side the recipe.  Some changes are made to better the recipe, some due to my husbands allergies and some because of our preferences.
http://www.hrsm.sc.edu/McCutchen-house/Recipes/countrycaptainschicken.pdf


2 each onions, chopped [We love onions, I use 2 vidalia onions which are probably bigger and therefore more than the recipe calls for, but we're okay with that]
2 Tbs. butter [I use olive oil]
2 each green bell peppers, chopped
1 Tbs. curry powder [I used 2 TB--1 is just not flavorful enough; also beware that house brand curry at the grocery store is extremely bland, we bought some Indian curry from Amazon, but if you don't want 64oz of curry on hand--don't worry we got it for a deal--I'd look for some real curry at a local Indian grocery store or at least buy a name brand spice like McCormicks]
1 can (16 oz) whole tomatoes, roughly chopped [I just used a 14.5oz can of chopped tomatoes and if I have any fresh around I add a little more]
½ cup chicken broth [I grew up with bouillon cubes, but canned, boxed or homemade broth is WAY better--if you do use bouillon cubes I would double the number of cubes you use]
1 Tbs. parsley, chopped [I just used dried parsley-1 teaspoon]
½ tspn. salt
¼ tspn. black pepper
¼ tspn. ground mace [I never put this in]
1 clove garlic, minced
6 each boneless, skinless chicken breasts [I usually just put 3 breasts in but don't half anything else]
2 Tbs. flour [I use cornstarch instead, I'm pretty sure I use more than 2 TB, I just cover a small plate with cornstarch and lay the breast on top and coat both sides in cornstarch]
2 Tbs. vegetable oil [Again I replace this with olive oil]
(Serves 6 guests) [Using only 3 breasts it give us more veggies per serving and makes enough for dinner for 2 plus 2 lunches for my husband]
DIRECTIONS
In a large saucepan, sauté the onion in the butter until lightly browned, add the bell pepper and continue to cook an additional five minutes.
Stir in the curry and cook for a minute, add the entire contents of the tomatoes, chicken broth, parsley, salt, pepper, mace, and garlic. Bring the sauce to a boil, then reduce to a simmer and cook, covered, for five more minutes.
Flour the chicken breast and shake off any excess. Heat the vegetable oil in a large pan and brown the chicken on both sides. Add the chicken to the tomato mixture and continue to cook, covered, for another thirty minutes, stirring occasionally. If the sauce becomes too thick, water may be added.
Serve immediately over rice. [I use brown rice]

Hope y'all enjoy it as much as we do!

Sunday, September 27, 2009

Daring Bakers September Challenge--Vols Au Vent

The September 2009 Daring Bakers' challenge was hosted by Steph of A Whisk and a Spoon. She chose the French treat, Vols-au-Vent based on the Puff Pastry recipe by Michel Richard from the cookbook Baking With Julia by Dorie Greenspan.

I was so excited when I heard about this challenge, a little nervous that it wouldn't work out but how fun to be able to say I made puff pastry!  I took advantage of the Labor Day 3-day weekend and made my puff pastry early in the month.  Everything went well, I didn't have any trouble with the butter melting and it was so convenient to be able to throw it in the fridge, run an errand or two, and then come back to it!  

The advantage of being a daring baker is that you end up trying recipes you wouldn't normally try.  And the host of the month has already tried the recipe and provides very helpful tips you don't normally find with a recipe.  This month I found those tips to be especially helpful and all worked well!  Here's my dough between turns. So pretty!


I happened to have 2 sizes of this scalloped heart cookie cutter, so I used that to form the vols au vents and I got a pretty good rise.  It took me awhile to figure out what I wanted to put in them, but I knew I wanted to make a dessert for sure.  I ended up making white chocolate mousse (receipe from The Joy of Cooking) and combined that with some slightly too runny vanilla-peach freezer jam.  They were SO delicious that I'm craving it now as I write this!


  One of those tips from the host suggested using the scraps to make something that doesn't need a lot of rise like cheese straws. That gave me the idea of making cinnamon & sugar straws, sticks, twists, whatever you want to call them.  So, that same weekend I made these beauties that also tasted pretty good.


The next weekend I finished using up my puff pastry by making more vols au vents.  This time I used a couple different sized cups and didn't seem to get as good of a rise, maybe because the dough was a little old?  This time I made a savory filling.  I filled them with cucumber dill sauce and hickory smoked chicken!  It was pretty good.  


Then, I used the scraps and made another item suggested by the host, Napoleons!  For some reason I've been wanting to make these and using my own homemade puff pastry made it even more fun.  I made the custard from scratch and just dusted the top with powdered sugar (recipe from The Joy of Cooking), rather than making the frosting you typically find on them at bakeries.  They were SO good!


Friday, September 25, 2009

Herbed White Beans


Al's not much of a bean guy, but he loves this side dish!  The recipe is based off a recipe found in the You on a Diet book by Dr. Oz & Roizen.


You'll need:
-1 TB olive oil

-1/2-1 tomato (depending on your preference), chopped

-1/2 sweet onion, chopped

-1 can Great Northern Beans, drained and rinsed
-1 clove of garlic, chopped/pressed

-1 teaspoon red wine vinegar
-handful (~1/4 cup total) of chopped basil and dill
(We prefers all dill but I have a hard time growing it here, so I supplement with my weed of a basil plant)

Start out by heating the olive oil in a pan, add the chopped onions and cook until translucent and soft.
Add the rest of the ingredients and season with pepper and salt (preferably Kosher salt).  Cook for 15-20 minutes, stirring occasionally.  Of course, Al prefers everything to be cooked longer so that the flavors can blend, so I usually cook it for 30-45 minutes, but 15-20 will do ya fine.  Also, Al prefers the beans mashed up, so I mash them while I stir and I get this.

Such a yummy side dish and goes well with Mediterranean chicken!

Tuesday, September 15, 2009

Pork Pinwheels


Al has SO many BBQ books that I decided we needed to really start going through them and trying the recipes.  So, I had him put sticky notes on recipes in 2 of his newest books, that he wanted to try and that were easy and semi-healthy enough for me to try on a weeknight.  One of which I tried the other day was pork pinwheels from his Big Bob Gibson BBQ book.  It calls for pork tenderloin, but being cheapskates like we are, we just used pork loin.  The pork is cut to approximately the size of a bacon strip, a bacon strip is placed on top, the pork is rolled up and toothpicks are put in to keep it rolled. Then, we brushed on top Al's mustard maple sauce creation (rather than BBG's sauce recipe).  Really you can use any BBQ sauce you want. Then on both sides you press in a 1/4 cup chopped pecan, 1 teas. salt and 1 teas. pepper mix.  Then grill for about 30 minutes.


Al gave it 1.5 thumbs up, I was not that big of a fan, maybe 1 thumb up for me.

Friday, September 4, 2009

Tomato Sandwiches

This summer Al's mom introduced me to tomato sandwiches.  Y'all may already know about this delicious secret, but in case you don't, I thought I would share.

Mom uses a regular piece of bread, but usually I only have english muffins in my house and the tomato slices fit perfectly, so I figure it's a perfect adjustment.  Also, traditionally you use cheddar cheese, but for a healthier version we use low-fat mozzarella.


Just toast a piece of bread or an english muffin.
Add a couple slices of cheese to the bread and melt in the microwave for about 20 seconds.


Then, add a couple of thick slices of tomato.
Top with a couple squeezes of light mayo.
Lastly, sprinkle with salt and pepper.

Thursday, August 27, 2009

Daring Bakers August Challenge--Dobos Torte

The August 2009 Daring Bakers' challenge was hosted by Angela of A Spoonful
of Sugar and Lorraine of Not Quite Nigella. They chose the spectacular Dobos
Torte based on a recipe from Rick Rodgers' cookbook Kaffeehaus: Exquisite
Desserts from the Classic Caffés of Vienna, Budapest, and Prague.

The Dobos Torta is a five-layer sponge cake, filled with a rich chocolate buttercream and topped with thin wedges of caramel. (You may come across recipes which have anywhere between six and 12 layers of cake; there are numerous family variations!) It was invented in 1885 by József C. Dobos, a Hungarian baker, and it rapidly became famous throughout Europe for both its extraordinary taste and its keeping properties. The recipe was a secret until Dobos retired in 1906 and gave the recipe to the Budapest Confectioners' and Gingerbread Makers' Chamber of Industry, providing that every member of the chamber can use it freely.

Well, this was my first Challenge as a newbie Daring Baker and I semi-succeeded and semi-failed. I used the opportunity of being on vacation for a week at my in-laws house to attempt this intimidating challenge and I'm glad I did because it took me many, many hours over two days to only semi-succeed!

It was pretty cool making the sponge layers, I've never made a sponge cake before or a cake without using a cake pan. First you spread the pancake-like batter on parchment paper and bake for just a few minutes
and you get this perfectly thin sponge cake layer!


Day One I made 6 of these sponge cake layers and the buttercream frosting. We were given the option of varying the flavor of the buttercream, being inspired by my husband and living in peach capital (not GA) I chose peach buttercream. I planned on doubling the frosting but I doubled every ingredient except for the butter! But it was too late once I discovered my mistake. I tried to fix it but ended up ruining it--too late to start a new batch. So, I wrapped up my layers of sponge cake and ended for the day.

Day two, I remade the peach buttercream better than ever and also made some white chocolate buttercream for the top (a mistake, should've just stuck with the one kind). I assembled the cake alternating sponge with peach buttercream.
Then, I poured the kind of runny white chocolate buttercream that I hoped would thicken up--but didn't. So I ended up with this runny layer on top.

Next I made the caramel, which I luckily tasted before putting on the cake and discovered it had an extra strong lemon flavor and was burnt! This was at about 9:30pm on day two, and I was not in the mood to try again. I also opted not to add the decorative, optional nuts to the side due to allergies of family members that would be eating it.

So, this was my final product, runny white chocolate buttercream frosting and all.And to top it all off, I discovered that I don't like sponge cake ;)
But I did learn some new techniques--hopefully next month I'll be more successful.

Tuesday, August 25, 2009

Ratatouille

Have you ever seen this movie? Well we some friends that kept telling us we had to watch this movie, that Remy reminded them of Al. Well, Al was a little irritated that a rat reminded them of him. But after getting the movie for Christmas we finally watched it and within 3 minutes we knew exactly why Remy reminds our friends of Al. At the very beginning Remy is tasting food and can tell each ingredient that is in each dish--that's SO Al. So, it was only fitting that we should make Ratatouille ourselves don't you think?

We used this Eating Well Grilled Chicken Ratatouille recipe. I didn't take a picture of the grilled chicken, but it just looks like grilled chicken. Also, I didn't have any fresh marjoram and didn't care to buy any so I just used dried marjoram (which is actually in the family of oregano, so you could substitute oregano if you don't have any marjoram lying around). A little tip on converting fresh herbs to dried, 1TB fresh herbs = 1 teas. dried herbs.

Doesn't this look so colorful and delicious? I had more fun that I probably should've grilling up all these vegetables.I'm still deciding on whether or not I like eggplant but have recently learned that eggplants are best small, because they have no seeds. And eggplants should NOT be stored in the fridge.
The red (purple) onions are definitely a must that can't be substituted, I think they really make this dish!

And this is what we ended up with.
Now Al really likes vegetables despite his heavy meat eating tendencies, so he liked this dish enough to try it again some time, but not worthy enough for the menu rotation. I loved it because it was so fresh and summery and made me feel like I was eating so healthy.

Out of 10 Al would probably give this Grilled Chicken Ratatouille a 5 and I would give it a 7.